The Best Baked Chicken Bacon Ranch Tacos | Cheesy & Oven-Crispy

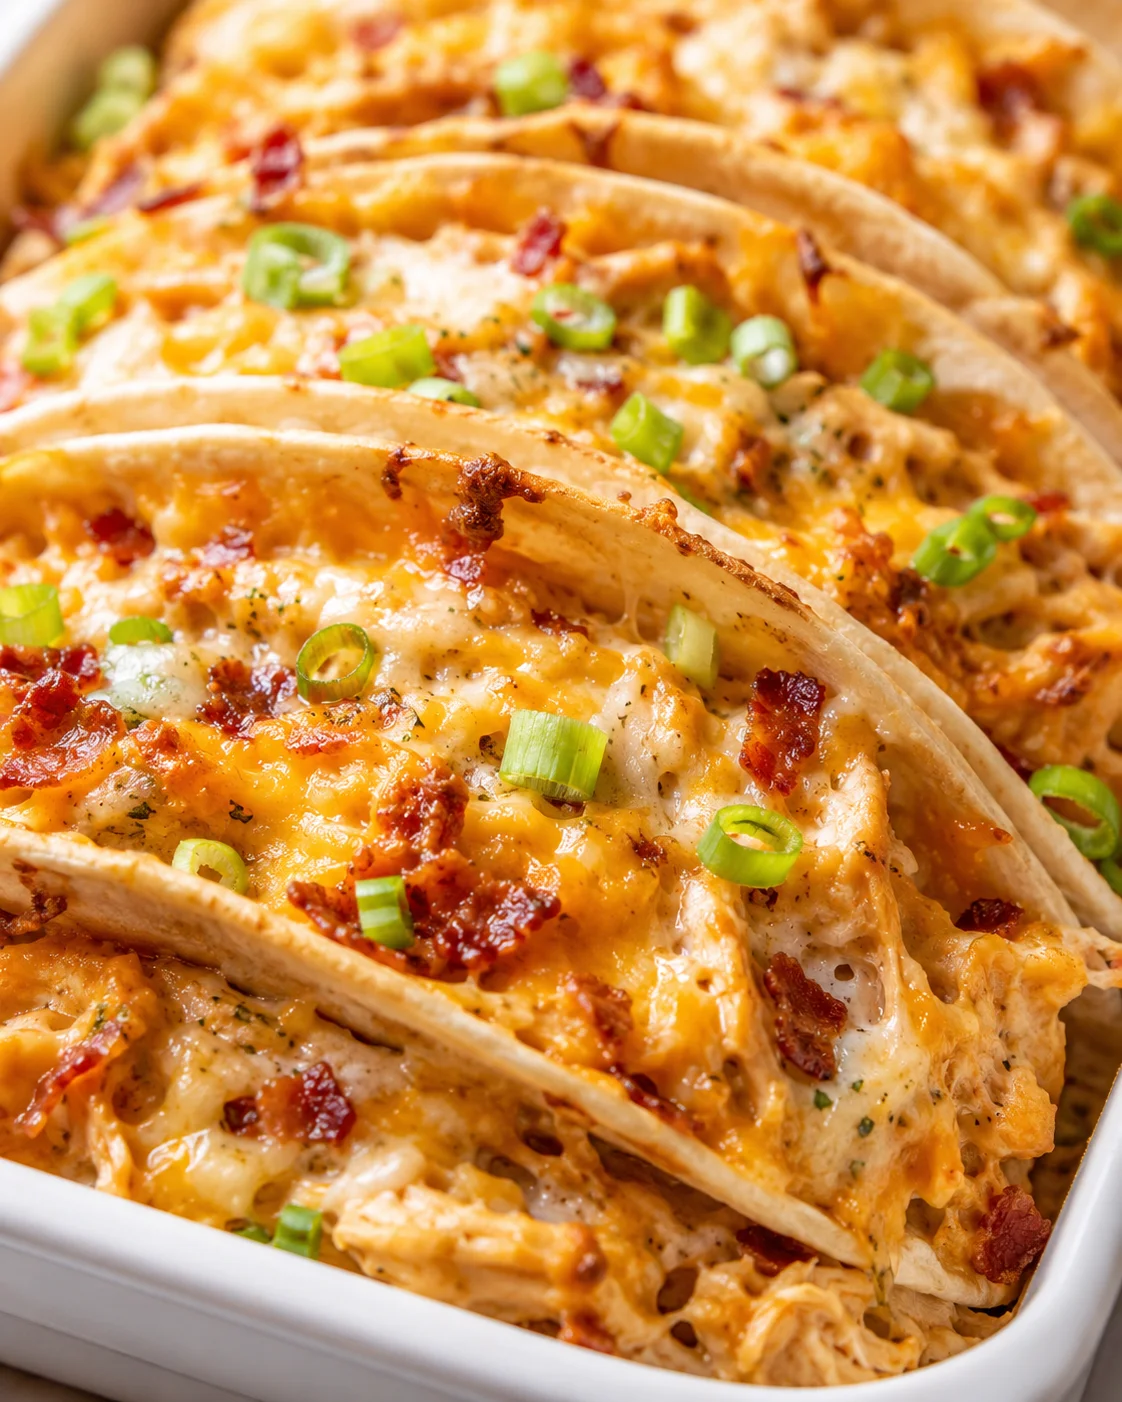
If you’re a fan of creamy ranch, crispy bacon, and gooey melted cheese tucked inside a perfectly baked taco shell, these chicken bacon ranch tacos baked in the oven are going to be your new favorite dinner. They come together quickly, bake to golden perfection (no frying needed), and are packed with flavor—ideal for busy weeknights, game days, or easy get-togethers with family and friends.
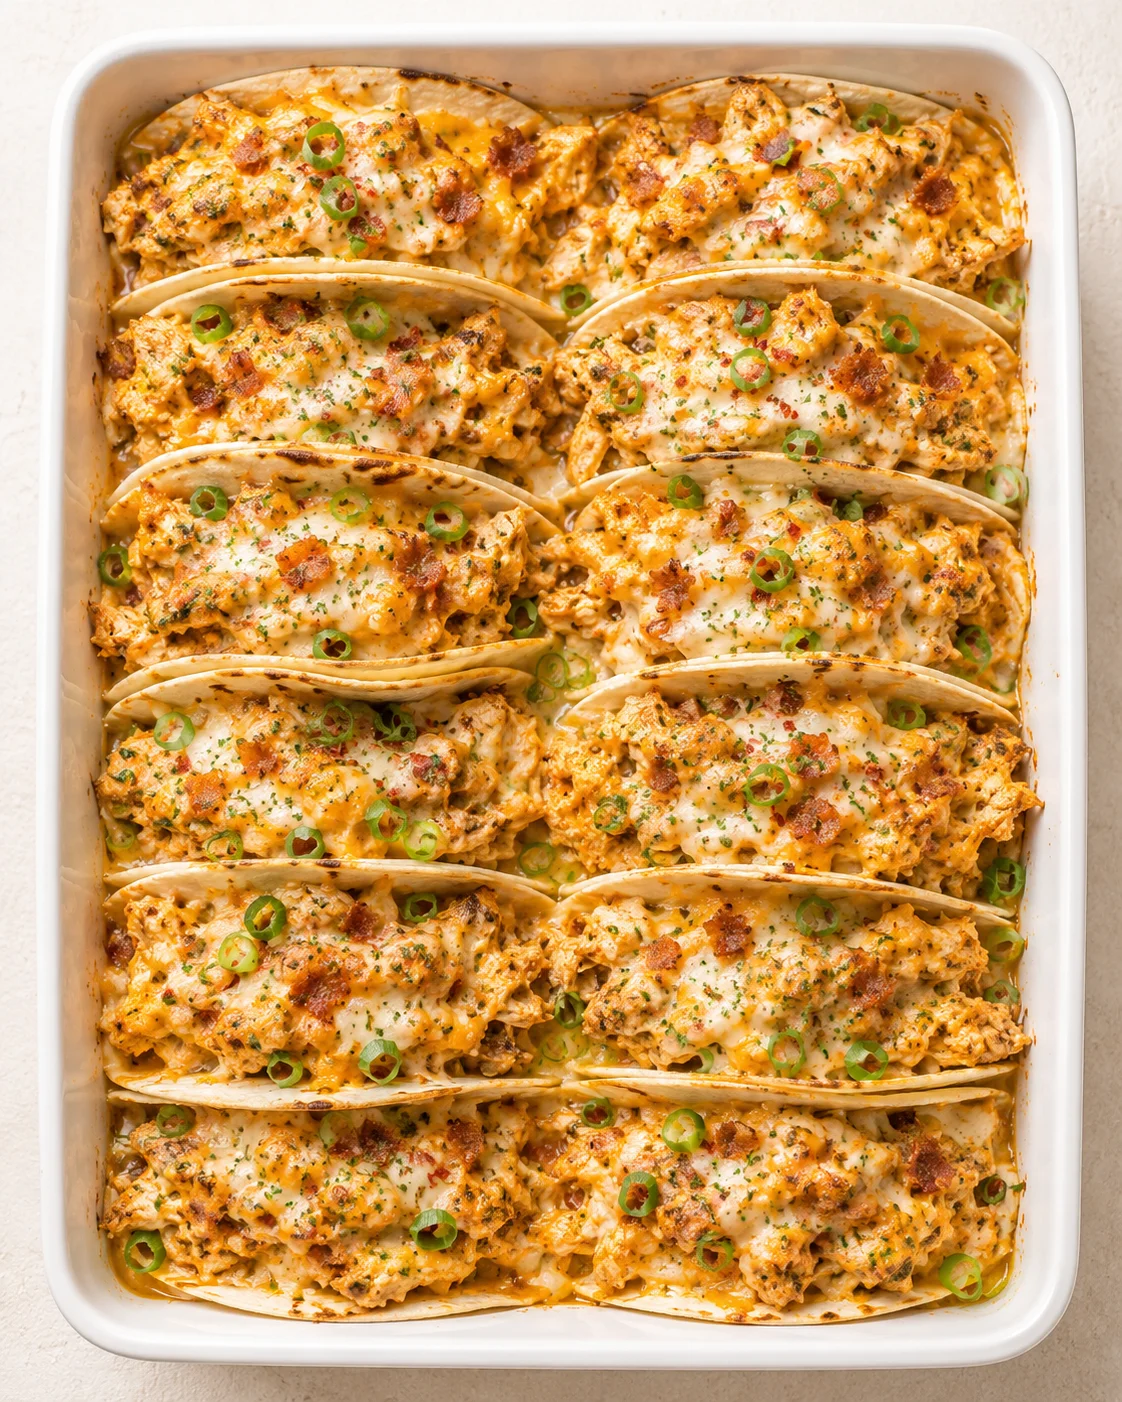
Oven-baked chicken bacon ranch tacos loaded with melty cheese, baked until perfectly crispy and golden brown.
Why You’ll Love This Recipe
- Crispy oven-baked shells with no frying required
- Kid-friendly flavors everyone in the family will want
- Perfect for meal prep or casual entertaining
- A bunch of ways to customize with your favorite cheeses and toppings
These chicken bacon ranch tacos baked in the oven bring that cozy, comforting feeling but come together in just minutes — with creamy ranch dressing, gooey melted cheese, and crispy bacon wrapped inside warm, baked flour tortillas (no messy frying). They’re perfect when your weeknights are hectic, for laid-back game day snacks, or whenever you want an easy, crowd-pleasing meal that doesn’t take forever in the kitchen.
This recipe has everything you need to make about 10–12 tacos: a quick list of simple ingredients (rotisserie chicken cuts your prep time in half), a straightforward step-by-step assembly and bake method (about 10 minutes to prep and 15–18 minutes in the oven), plus expert tips for getting crispy taco shells. I’ll also share easy ideas for customizing your chicken bacon ranch tacos, storing leftovers, reheating tips, and answers to your most common questions so you can make this recipe your own.
What You’ll Need
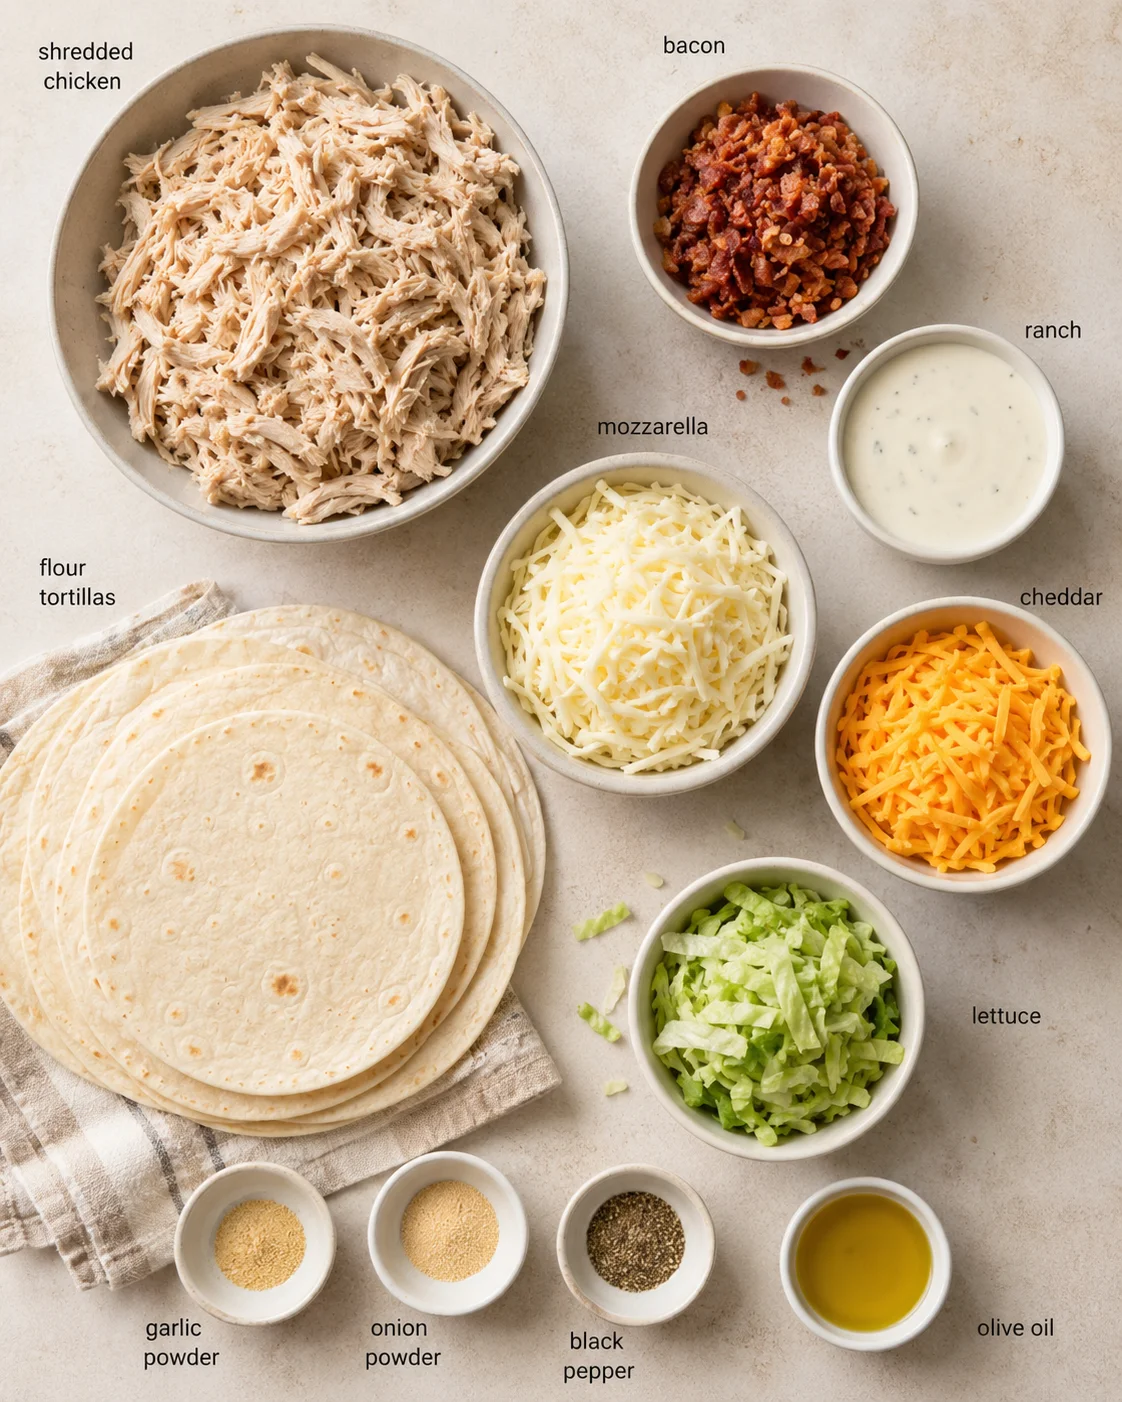
- 2 cups cooked chicken, shredded
- 6 slices bacon, cooked and crumbled
- 1 cup shredded mozzarella cheese
- 1 cup shredded cheddar or Colby Jack cheese
- ⅓ cup ranch dressing (plus extra for drizzling)
- 10–12 small flour tortillas (street-size)
- ½ teaspoon garlic powder
- ½ teaspoon onion powder
- ¼ teaspoon black pepper
- Olive oil spray or melted butter, for brushing
- 1 cup shredded iceberg or romaine lettuce
Assemble, Bake, and Serve
- Preheat oven to 400°F and lightly grease a baking dish or line a sheet pan (or set a wire rack over a sheet pan for extra-crispy shells).
- Cook bacon until crisp, then crumble.
- Shred or chop cooked chicken if not already shredded.
- In a large bowl, combine shredded chicken, crumbled bacon, mozzarella, cheddar, ranch dressing, garlic powder, onion powder, and black pepper; mix until evenly coated.
- Warm tortillas briefly until soft and pliable.
- Spoon the chicken-bacon-ranch filling into each tortilla (don’t overfill), fold or roll, and place seam-side down snugly in the prepared baking dish or on the sheet pan.
- Brush or spray the tops of the tacos with olive oil or melted butter.
-
Bake uncovered for 15–18 minutes, until the tortillas are crispy and the cheese is melted and bubbling.
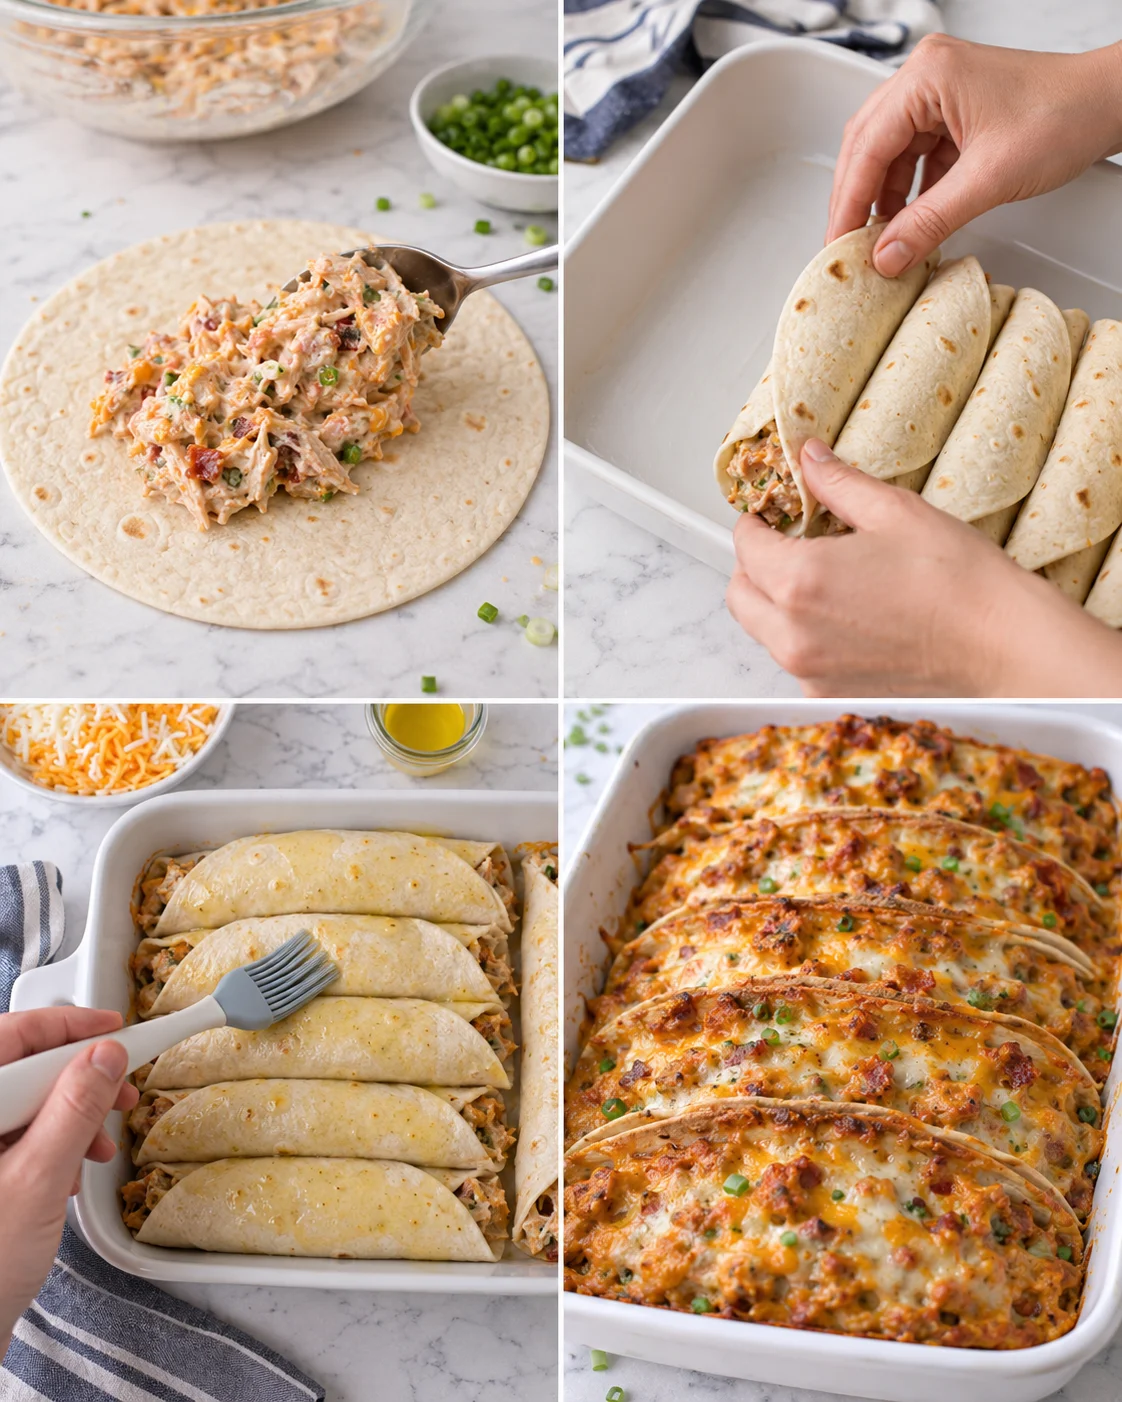
- Optional: broil 1–2 minutes at the end for extra crispness, watching closely to avoid burning.
- Let tacos cool 1–2 minutes, then top with shredded lettuce and drizzle extra ranch dressing.
Tips for Crispiest Shells
- Don’t stuff too much filling — overfilling will cause your tortillas to split while baking.
- Always use flour tortillas here—they hold up best in the oven and crisp up nicely.
- Fit the tacos snugly in your baking dish so they hold their shape as they cook (the same tight, side-by-side arrangement you’d use for creamy queso chicken enchiladas).
- For the crispiest shells, try baking them on a wire rack set over a sheet pan so air circulates all around; if you like this crisp, hands-off method, you’ll also enjoy Sheet Pan Chicken Pitas with Herby Ranch.
Flavor Swaps and Add-Ins
- Swap chicken for shredded rotisserie turkey if you have leftovers or want a twist.
- Add a drizzle of buffalo sauce to the filling for a spicy ranch version of these chicken bacon ranch tacos.
- Use pepper jack cheese instead of mozzarella or cheddar for a little more heat.
- Mix in sautéed onions and bell peppers for a fajita-style twist (like these Crockpot Chicken Fajitas), or add fresh jalapeños for extra kick.
How to Store and Reheat
Store any leftovers in an airtight container in your fridge for up to 3 days. When you’re ready to eat them again, heat your chicken bacon ranch tacos in the oven or air fryer to bring back their golden crispness. I recommend skipping the microwave to avoid soggy shells. Or, skip reheating and repurpose the chilled chicken and bacon into a fresh, no-heat lunch like this Chicken Club Pasta Salad.
Frequently Asked Questions
Can I make these ahead of time?
Absolutely! You can assemble your chicken bacon ranch tacos up to 24 hours in advance. Just keep them covered in the fridge, then bake fresh right before serving.
Can I use corn tortillas instead of flour?
Flour tortillas hold up best when baking to stay crispy, but if you prefer corn tortillas, warm them well so they’re flexible and handle gently to prevent tearing.
Are these tacos freezer-friendly?
You can freeze the filling ahead of time, but I recommend assembling the tacos fresh when you plan to bake them. This way, you keep the shells crisp and delicious.
Final Thoughts
These chicken bacon ranch tacos baked in the oven are exactly the kind of meal I love making: creamy, cheesy, crispy, and bursting with flavor—all without frying or extra fuss. They’re quick enough for busy weeknights yet tasty enough to impress guests. Once you try them, I bet you’ll be making these tacos on repeat, just like me! Craving a taco-night twist? Try the Street Corn Chicken Rice Bowl for similar bold flavors, or keep it low-carb with this Creamy Low Carb Chicken Casserole with Broccoli and Bacon.
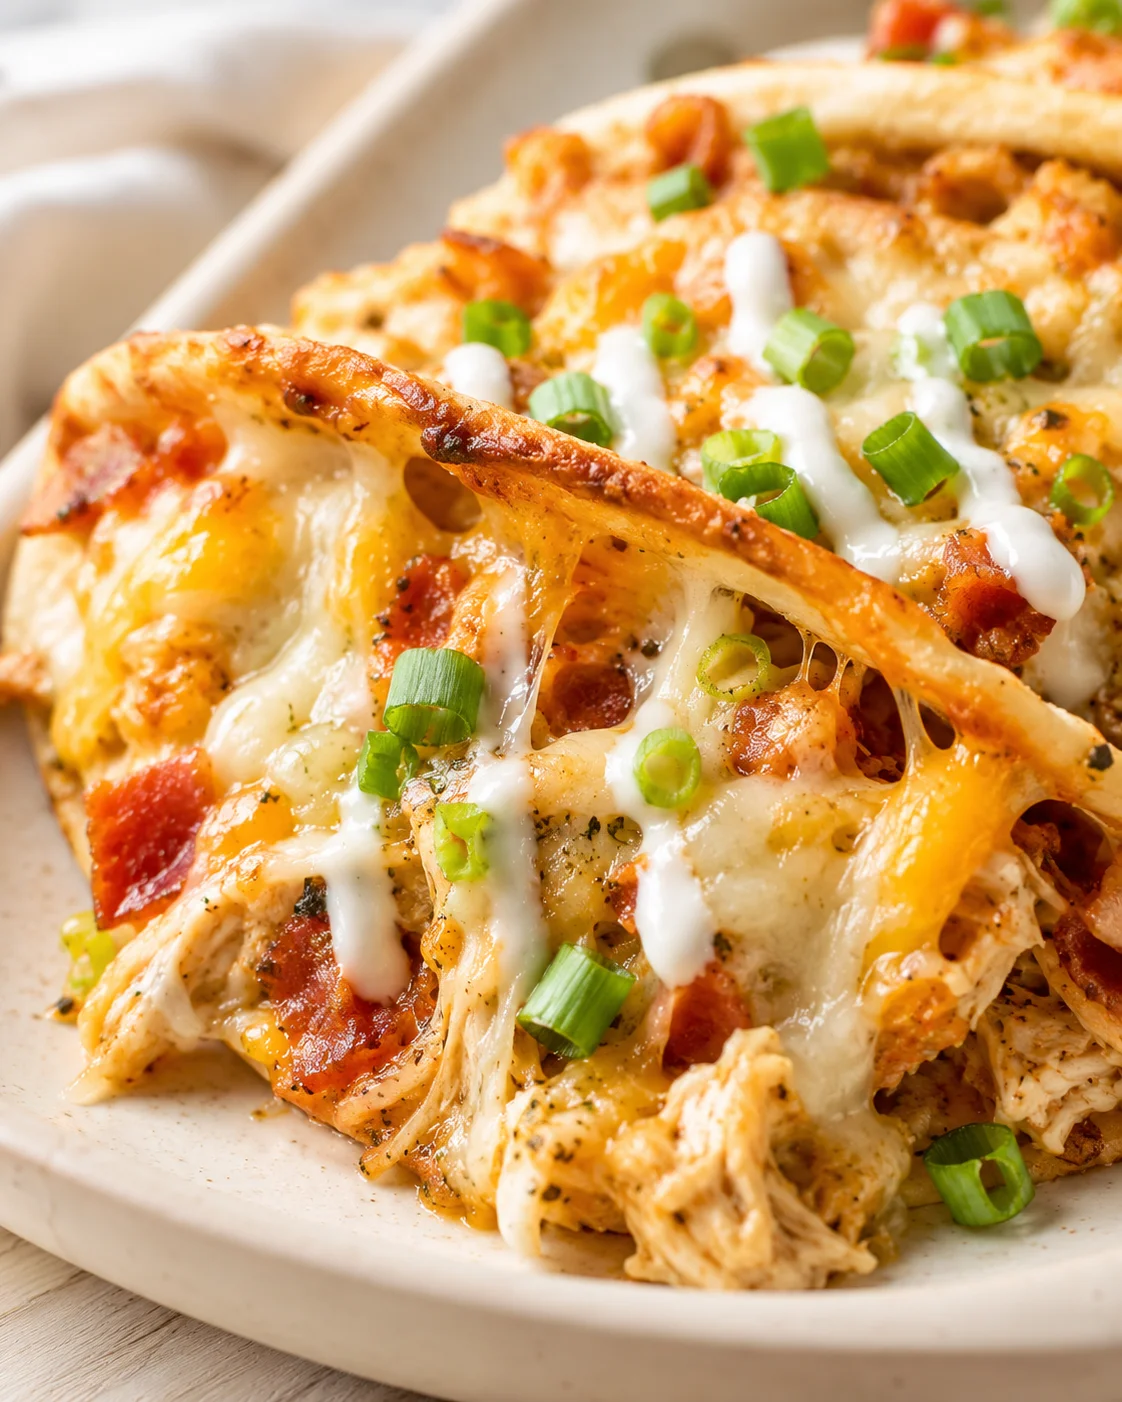
Golden, crispy baked tacos filled with creamy ranch chicken, crispy bacon, melty cheese, topped with fresh lettuce and ranch dressing—an easy, family-friendly weeknight dinner.
- Prep Time: 10 minutes
- Cook Time: 15-18 minutes
- Total Time: 25-28 minutes
- Yield: 10–12 tacos 1x
- Category: Dinner
- Cuisine: American
Ingredients
- 2 cups cooked chicken, shredded
- 6 slices bacon, cooked and crumbled
- 1 cup shredded mozzarella cheese
- 1 cup shredded cheddar or Colby Jack cheese
- ⅓ cup ranch dressing (plus extra for drizzling)
- 10–12 small flour tortillas (street-size)
- ½ teaspoon garlic powder
- ½ teaspoon onion powder
- ¼ teaspoon black pepper
- Olive oil spray or melted butter, for brushing
- 1 cup shredded iceberg or romaine lettuce
Instructions
- Preheat oven to 400°F. Lightly grease a baking dish or line a sheet pan (or set a wire rack over a sheet pan for extra-crispy shells).
- Cook bacon until crisp, then crumble.
- Shred or chop cooked chicken if not already shredded.
- In a large bowl, combine shredded chicken, crumbled bacon, mozzarella, cheddar, ranch dressing, garlic powder, onion powder, and black pepper; mix until evenly coated.
- Warm tortillas briefly until soft and pliable.
- Spoon the chicken-bacon-ranch filling into each tortilla (do not overfill), fold or roll, and place seam-side down snugly in the prepared baking dish or on the sheet pan.
- Brush or spray the tops of the tacos with olive oil or melted butter.
- Bake uncovered for 15–18 minutes, until tortillas are crispy and cheese is melted and bubbling.
- Optionally, broil 1–2 minutes at the end for extra crispness, watching closely to avoid burning.
- Let tacos cool 1–2 minutes, then top with shredded lettuce and drizzle extra ranch dressing.
- Serve warm and enjoy!
Notes
Avoid overfilling tortillas to prevent cracking during baking., For extra crispy tacos, broil for 1–2 minutes after baking., Using rotisserie chicken saves time and adds flavor., Flour tortillas hold up best for baking to achieve crispy shells., Store leftovers in an airtight container in the refrigerator for up to 3 days., Reheat in oven or air fryer to restore crispness; avoid microwaving to prevent sogginess., Tacos can be assembled up to 24 hours in advance and baked fresh before serving.
Nutrition
- Serving Size: 1 taco
- Calories: Approximately 250-300 kcal per taco (estimate based on ingredients)
- Fat: Approximately 16g per serving
- Carbohydrates: Approximately 20g per serving
- Protein: Approximately 15g per serving
More in Recipes

Split Pea Soup
Cowboy Soup
Italian Wedding Soup