Cheeseburger Wrap – Organize Yourself Skinny

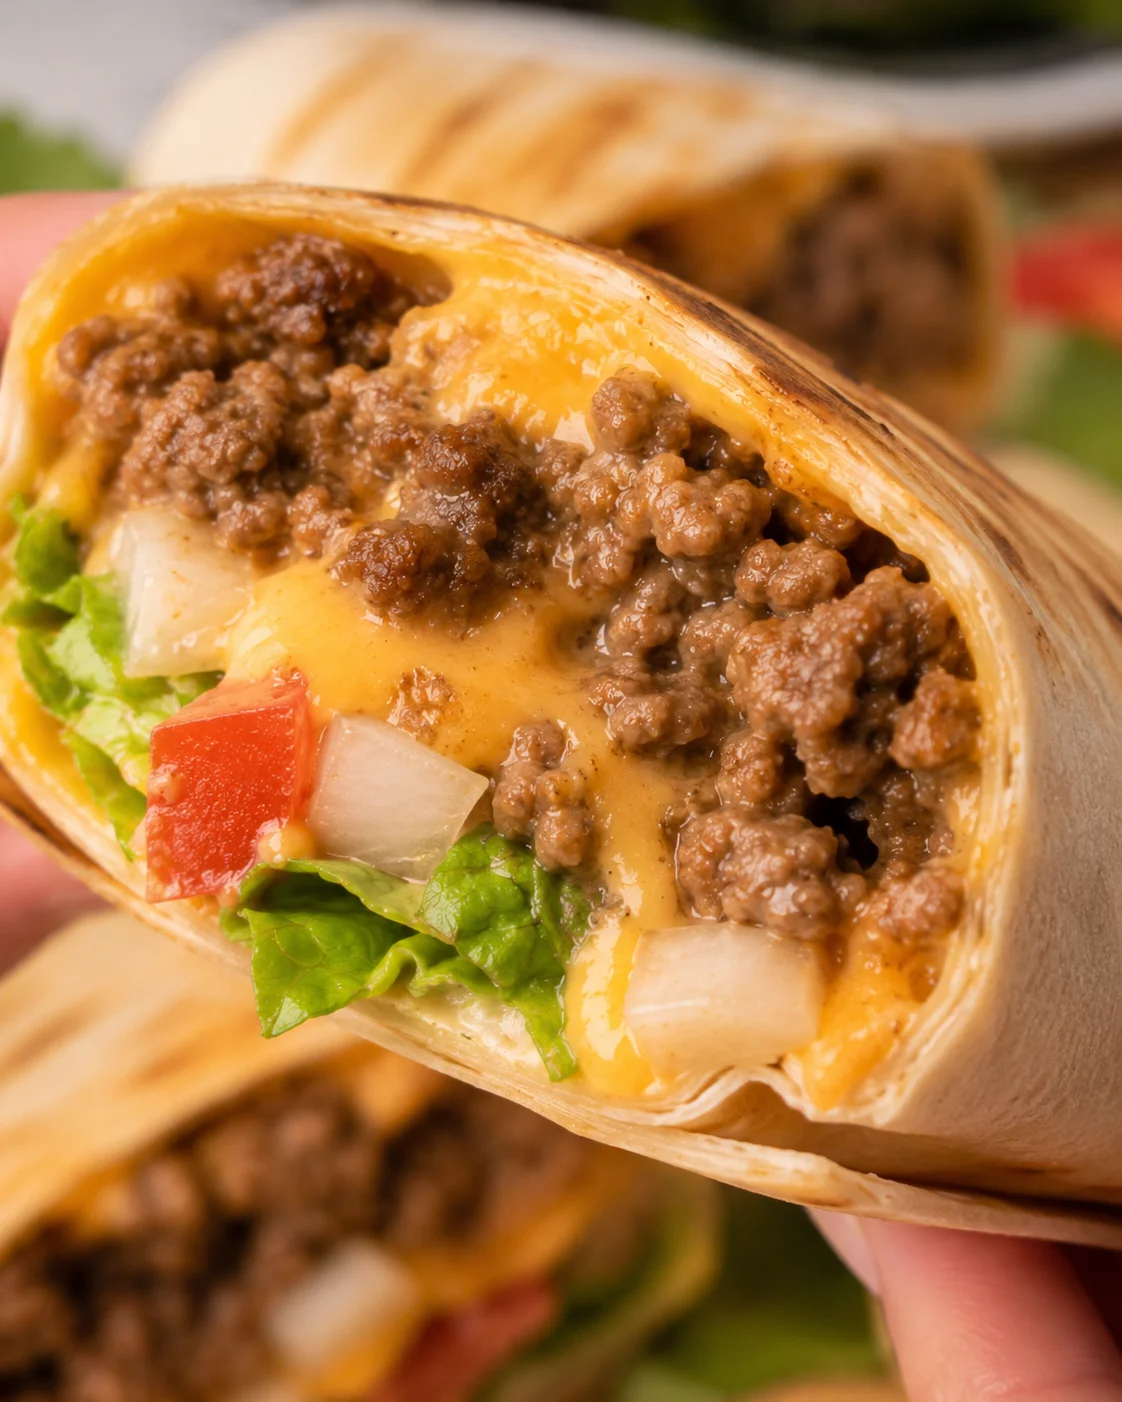
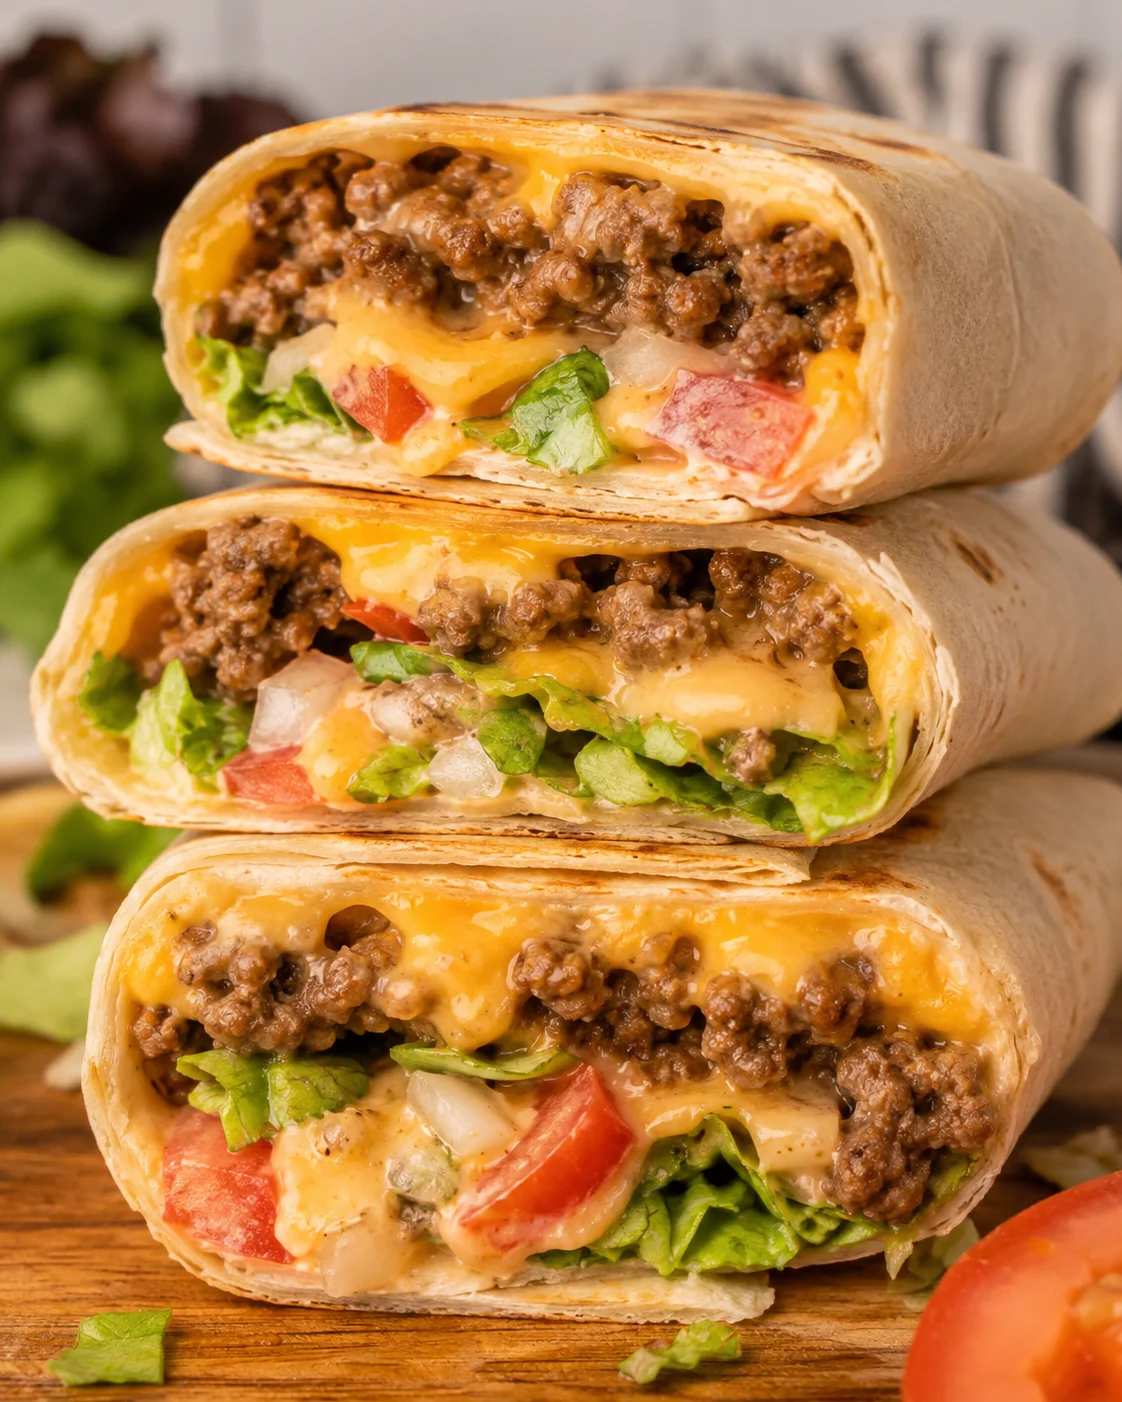 If you love cheeseburgers but want something quicker and less messy, grilled cheeseburger wraps are the way to go for a weeknight meal. Juicy, flavorful ground beef, gooey American cheese, and your favorite burger toppings get wrapped up in a medium tortilla and grilled for a crispy, satisfying crunch-wrap texture.
This recipe is perfect for families, comes together in under 30 minutes using just a skillet and indoor grill pan (or a frying pan), and makes five filling wraps from one pound of beef and five tortillas.
Keep scrolling for the full ingredient list, step-by-step instructions for assembling and grilling your cheeseburger wrap, tips on prepping the beef filling ahead or freezing it, smart swaps for healthier or vegetarian versions, and some tasty serving ideas to complete your meal.
Why This Works for Busy Nights
- Super quick and easy. You’ll have these burger wraps on the table in less than 30 minutes, perfect for those hectic evenings. For another fast weeknight option, the Korean Ground Beef Bowl is ready in about 25 minutes.
- Flavor-packed and satisfying. The beef is juicy and loaded with flavor so these wraps really satisfy a cheeseburger craving.
- High in protein and reasonably healthy. Packed with lean beef and veggies, they’re hearty without weighing you down. For more high-protein dinner inspiration, try this High Protein Ground Turkey Casserole.
- Make-ahead friendly. Prepare the beef mixture in advance to speed up dinner even more.
Essential Ingredients
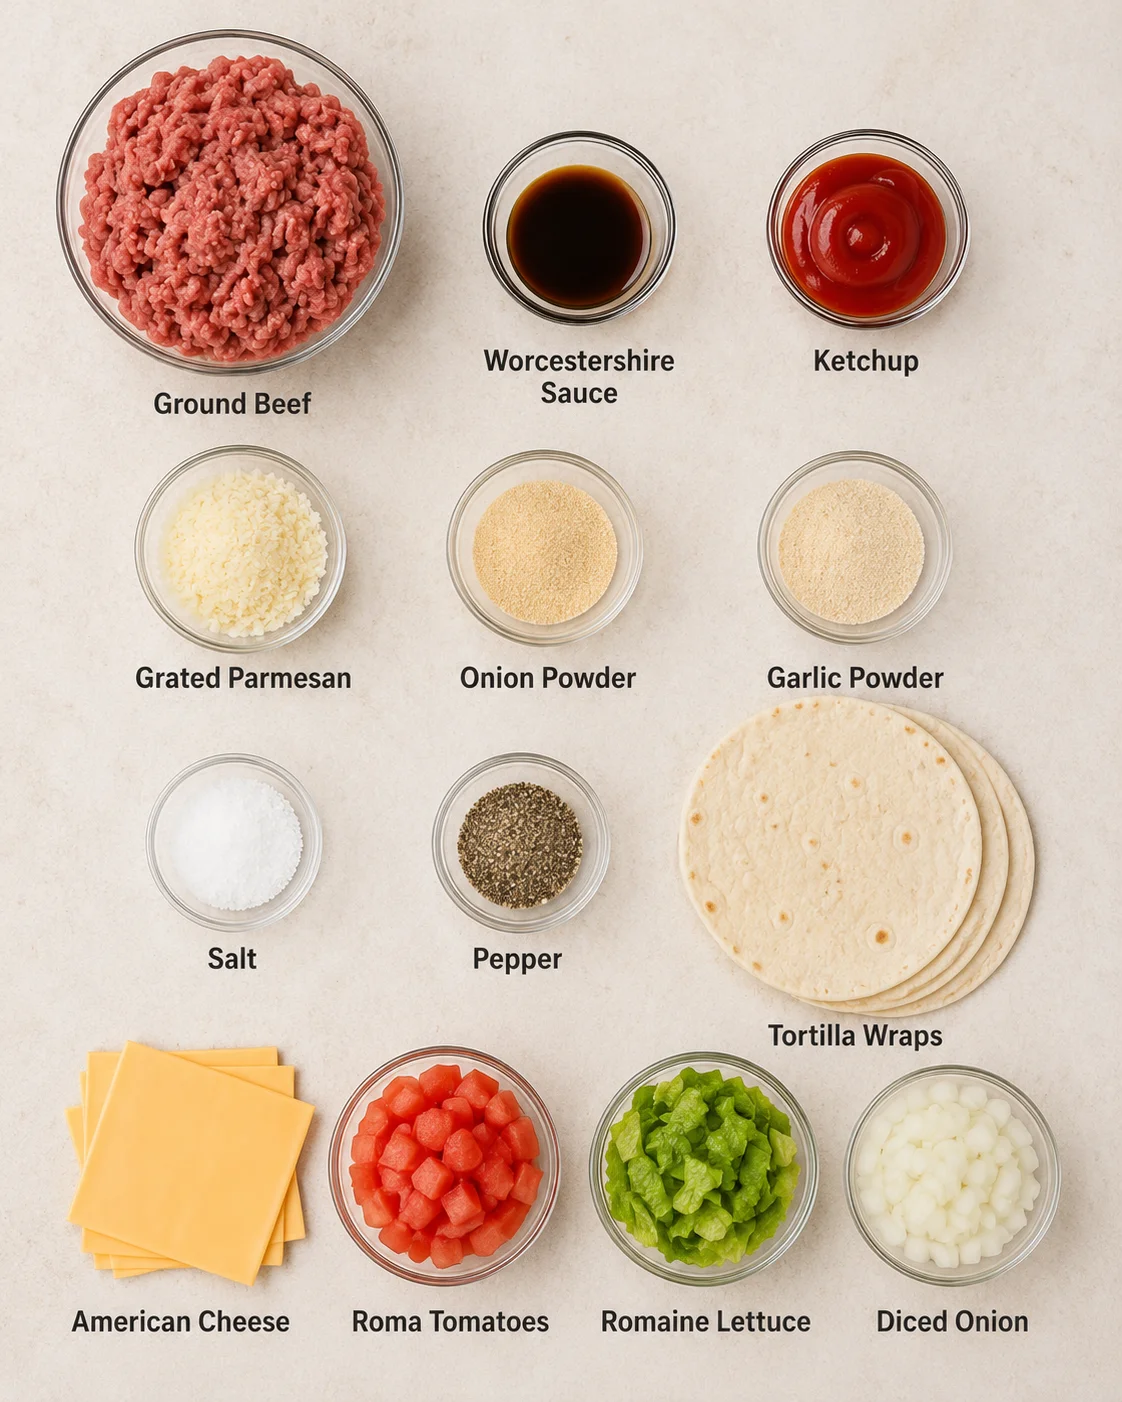
- 1 pound lean ground beef
- 1 tablespoon Worcestershire sauce
- 1 tablespoon ketchup
- 1 tablespoon grated parmesan
- 1 teaspoon onion powder
- 1 teaspoon garlic powder
- 1/8 teaspoon salt
- 1/8 teaspoon pepper
- 5 medium tortilla wraps
- 5 slices American cheese
- 2 Roma tomatoes sliced
- 1 cup of romaine lettuce
- diced onions optional
- Condiments (ketchup, mustard, mayonnaise, relish) optional
How to Make the Wraps
- Spray a large skillet with cooking spray.
- Cook ground beef in the skillet over medium heat, stirring and breaking up the meat, until mostly done but still slightly pink, about 7–10 minutes.
- Stir in Worcestershire sauce, ketchup, grated Parmesan, onion powder, garlic powder, salt, and pepper until beef is evenly coated.
- Continue cooking the beef until fully cooked through and no pink remains.
- Preheat an indoor grill pan.
- Place a slice of American cheese in the center of each tortilla, then spoon about 1/3 cup of the cooked beef over the cheese.
- Top the beef with sliced tomato and romaine lettuce.
- Add desired condiments (ketchup, mustard, mayo, relish) on top of the filling, if using.
- Roll each tortilla tightly and place seam-side down on the preheated grill pan.
- Grill the wraps seam-side down for 3–4 minutes until grill marks appear.
-
Flip the wraps and grill the other side for another 3–4 minutes until the outside is crisp and golden.
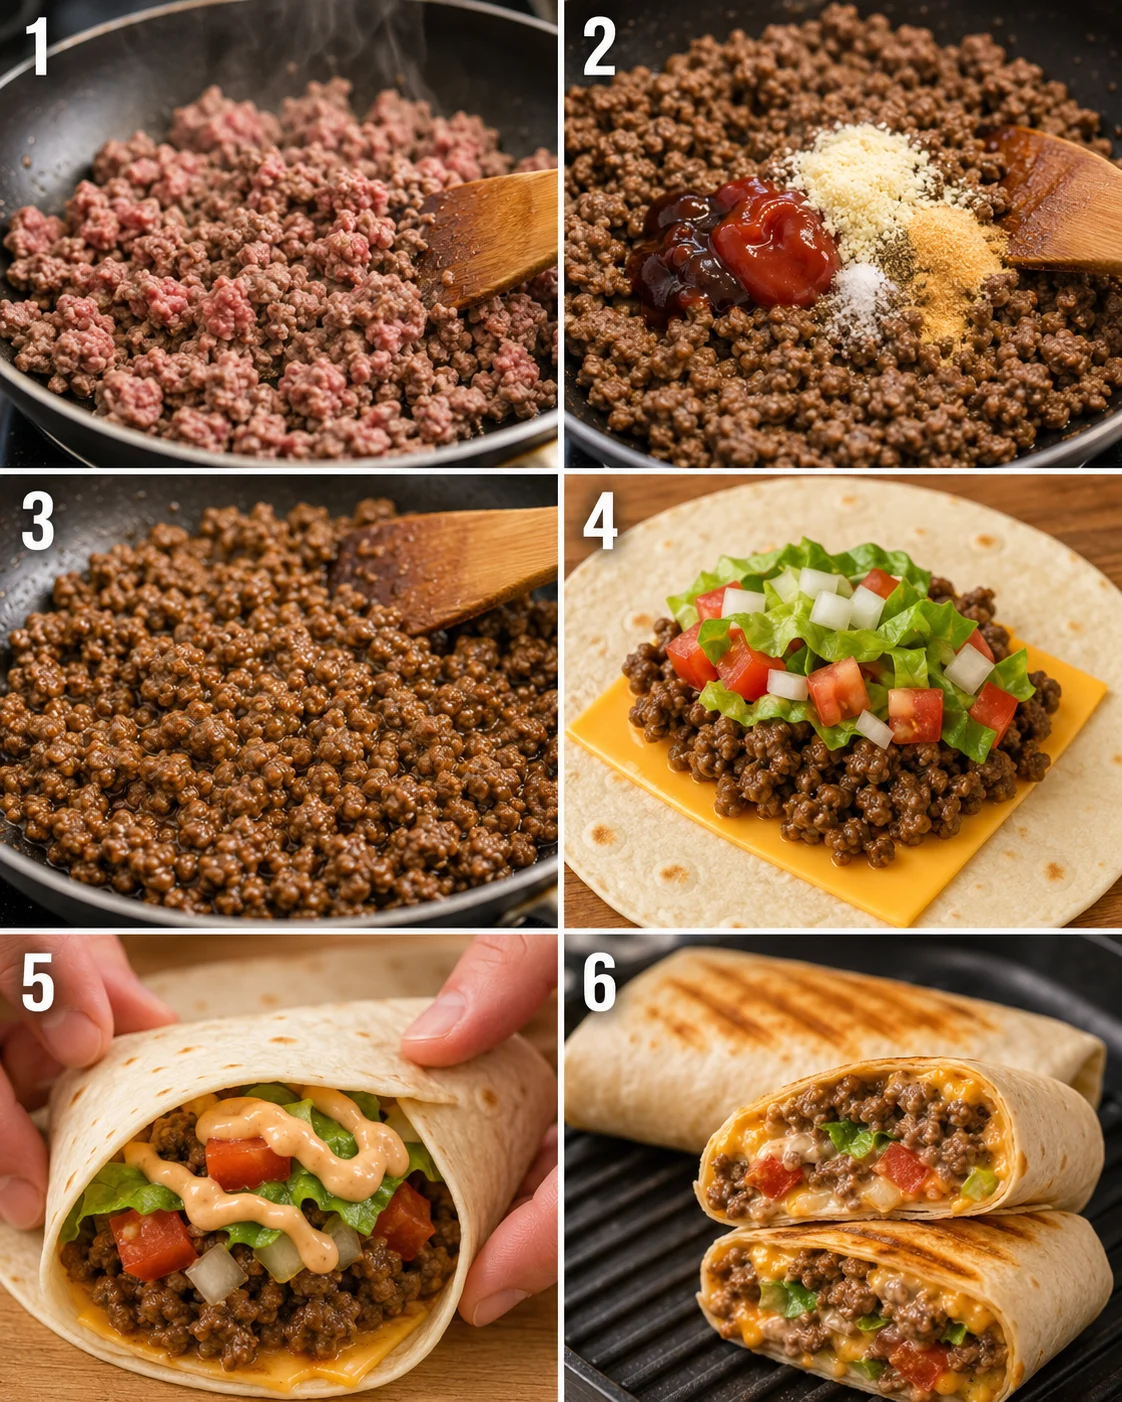
- Remove wraps from the grill and repeat with remaining tortillas.
Cooking Tips and Serving Ideas
Here are some of our favorite simple sides to serve along with your grilled cheeseburger wraps.
- Steamed veggies are an easy, healthy side. My go-to is frozen steam-in-bag mixes for convenience, or toss together a quick crunchy Asian slaw to add fresh, tangy crunch.
- Classic fries or baked sweet potato fries give that perfect burger-and-fries vibe.
- Crispy potato chips are great for a quick side with crunch.
- No grill pan? No problem! A large nonstick frying pan works just fine for cooking these wraps.
- Try folding the tortilla like a quesadilla instead of rolling for a bigger, easy-to-eat wrap. My husband prefers it this way sometimes.
- Grilled cheeseburger wraps are amazing with that crispy outside, but if you’re short on time, these wraps still taste delicious even without grilling.
Flavor Swaps and Add-Ins
- Swap lean ground turkey for beef if you want a lighter option. Plant-based meat crumbles also work great for a vegetarian version.
- Use your favorite wrap style: low-carb, gluten-free, or classic tortillas all work well.
- For a low-carb twist, skip the tortilla and serve the beef filling wrapped in large salad leaves, or try a Savory Smash Burger Bowl for a bunless burger vibe.
- Customize your filling with extras like sautéed mushrooms, jalapenos, pickles, or avocado slices.
- Mix up the condiments! Try barbecue sauce, ranch dressing, or blue cheese for a fun flavor change—if you want a from-scratch option, this herby ranch dressing pairs great with burger flavors.
- Change up the cheese to try cheddar, pepper jack, gouda, Swiss, or mozzarella for a new taste experience.
Storage and Make-Ahead Tips
For the week: Prepare the beef filling ahead and store it in a sealed container in the fridge. When ready to eat, warm it before assembling your cheeseburger wraps. If you like prepping protein for easy weeknight meals, our Classic Ground Beef and Rice Skillet also keeps well for a few days.
For the freezer: Freeze the cooked beef filling in a labeled airtight container or freezer bag. Thaw overnight in the fridge before warming and assembling the wraps. For another freezer-friendly, family-pleasing option, try the Cheesy Meatloaf Casserole that reheats beautifully.
Answers to Common Questions
Can I make the beef filling ahead of time? — Absolutely! Cook the beef filling, cool it, and store it in the fridge for 3-4 days. For longer storage, freezing works great too.
Can I freeze fully assembled wraps? — Freezing just the filling is best to keep the texture. If you freeze assembled wraps, they might get soggy. If you do freeze them, wrap tightly and reheat on a grill pan or in the oven to restore some crunch.
How do I reheat leftovers? — Reheat the beef filling in a skillet until hot. For assembled wraps, use the grill pan for a few minutes on each side or warm in a 350°F oven. Microwaving is fastest but softens the tortilla.
What ground beef should I use? — I recommend lean, high-quality beef like 93/7 for flavor with less fat. If you use 85/15, drain the extra grease before assembling.
Can I make this lower-fat or vegetarian? — Definitely! Swap in ground turkey or plant-based crumbles, or go low-carb by wrapping the filling in lettuce leaves.
Do I need an indoor grill pan? — No, a big skillet or frying pan works fine. See our Southwest Chicken Wrap for another fast, skillet-seared wrap.
How can I keep the wrap from getting soggy? — Drain the cooked beef well, use condiments sparingly, and pat your tomato slices dry. Grill seam side down first to seal the wrap and lock in crispness.
Can I change the cheese and condiments? — Of course! American cheese gives that classic taste, but you can use cheddar, pepper jack, gouda, Swiss, or mozzarella. Swap ketchup and mustard for BBQ sauce, ranch, or blue cheese dressing to mix it up. For a ranchy twist, these baked chicken bacon ranch tacos show how creamy ranch plays with melty cheese.
Where can I find nutrition info? — Nutrition facts are listed per serving with the specified ingredients. Changing cheese, meat, or wraps will affect the numbers.
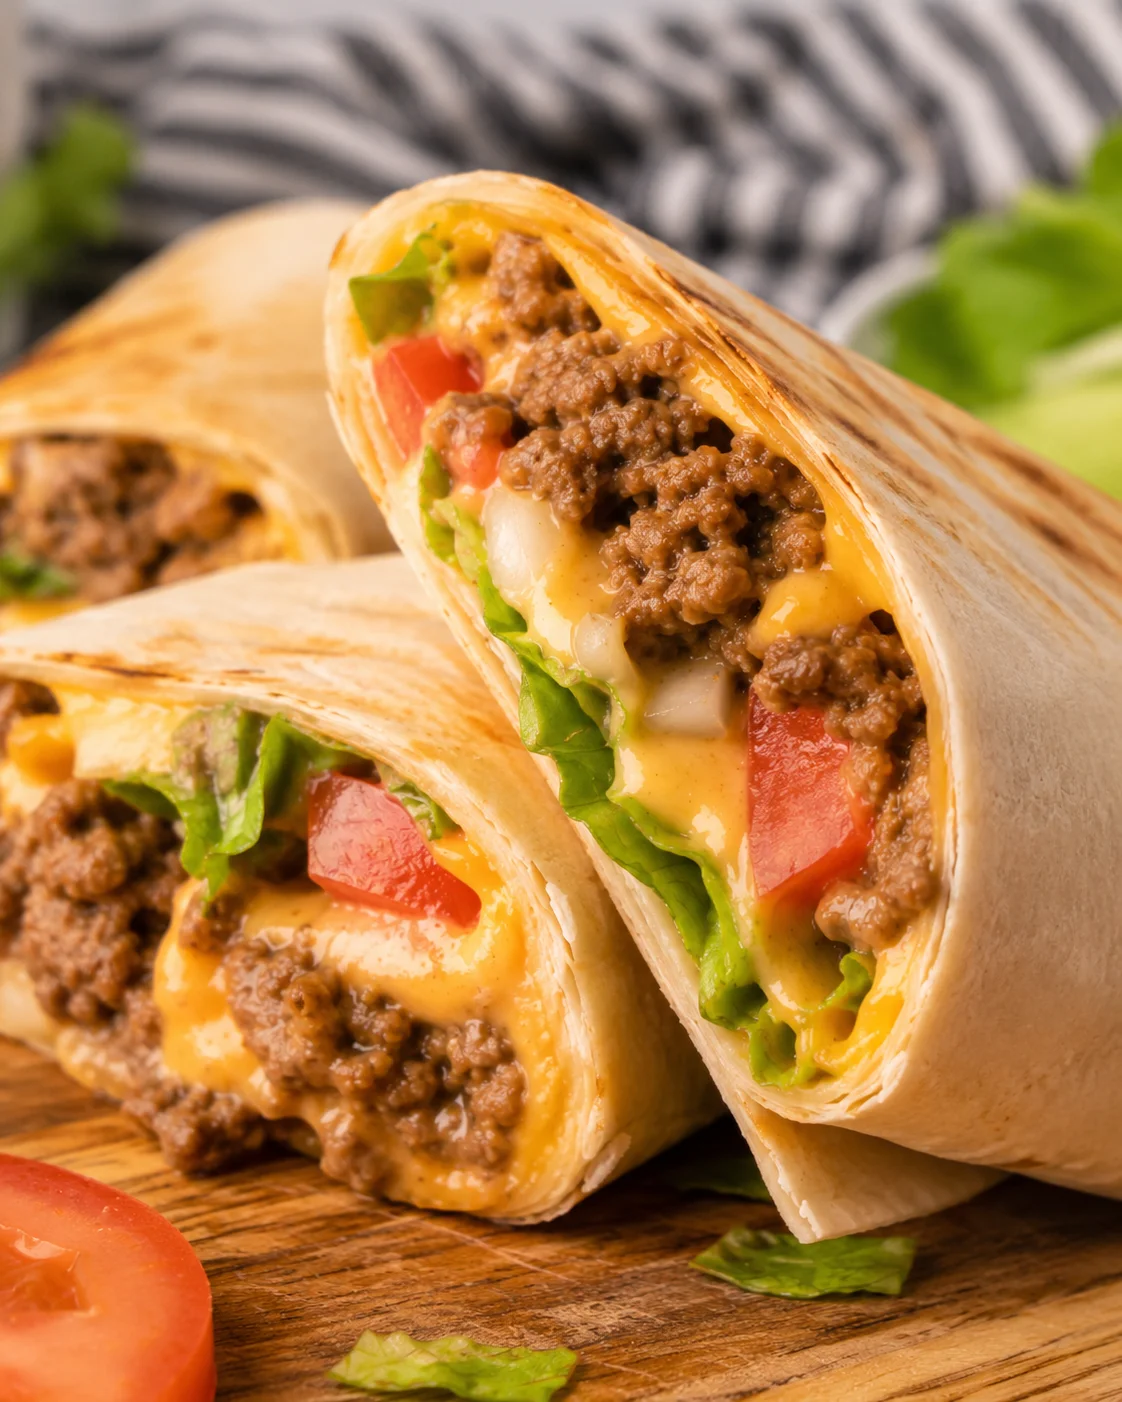
A grilled tortilla wrap filled with seasoned ground beef, melted cheese, fresh tomatoes, and romaine lettuce, offering the classic flavors of a cheeseburger with a satisfying crunch.
- Prep Time: 10 minutes
- Cook Time: 20 minutes
- Total Time: 30 minutes
- Yield: 5 wraps 1x
- Category: Main Course
Ingredients
- 1 pound lean ground beef
- 1 tablespoon Worcestershire sauce
- 1 tablespoon ketchup
- 1 tablespoon grated parmesan
- 1 teaspoon onion powder
- 1 teaspoon garlic powder
- 1/8 teaspoon salt
- 1/8 teaspoon pepper
- 5 medium tortilla wraps
- 5 slices American cheese
- 2 Roma tomatoes, sliced
- 1 cup romaine lettuce
- Diced onions (optional)
- Condiments: ketchup, mustard, mayonnaise, relish (optional)
Instructions
- Spray a large skillet with cooking spray.
- Cook ground beef in the skillet over medium heat, stirring and breaking up the meat, until mostly done but still slightly pink, about 7-10 minutes.
- Stir in Worcestershire sauce, ketchup, grated Parmesan, onion powder, garlic powder, salt, and pepper until beef is evenly coated.
- Continue cooking the beef until fully cooked through and no pink remains.
- Preheat an indoor grill pan.
- Place a slice of American cheese in the center of each tortilla, then spoon about 1/3 cup of the cooked beef over the cheese.
- Top the beef with sliced tomato and romaine lettuce.
- Add desired condiments (ketchup, mustard, mayo, relish) on top of the filling, if using.
- Roll each tortilla tightly and place seam-side down on the preheated grill pan.
- Grill the wraps seam-side down for 3-4 minutes until grill marks appear.
- Flip the wraps and grill the other side for another 3-4 minutes until the outside is crisp and golden.
- Remove wraps from the grill and repeat with remaining tortillas.
Notes
Make the beef filling ahead of time and store in an airtight container in the fridge for 3-4 days., The cooked beef filling freezes well; thaw overnight in the fridge before reheating., If freezing assembled wraps, they may become soggy; reheating on a grill pan or oven can help restore crunch., No grill pan is necessary; a large nonstick frying pan works fine., Variations include swapping ground beef for turkey or plant-based crumbles for vegetarian options, or using lettuce leaves instead of tortillas for a low-carb version., Cheese and condiments can be varied to taste, such as cheddar, gouda, BBQ sauce, or ranch dressing.
Nutrition
- Serving Size: 1 wrap
- Calories: 396 kcal per serving
- Fat: 17 g per serving
- Carbohydrates: 33 g per serving
- Protein: 26 g per serving
More in Recipes
Split Pea Soup
Cowboy Soup
Italian Wedding Soup