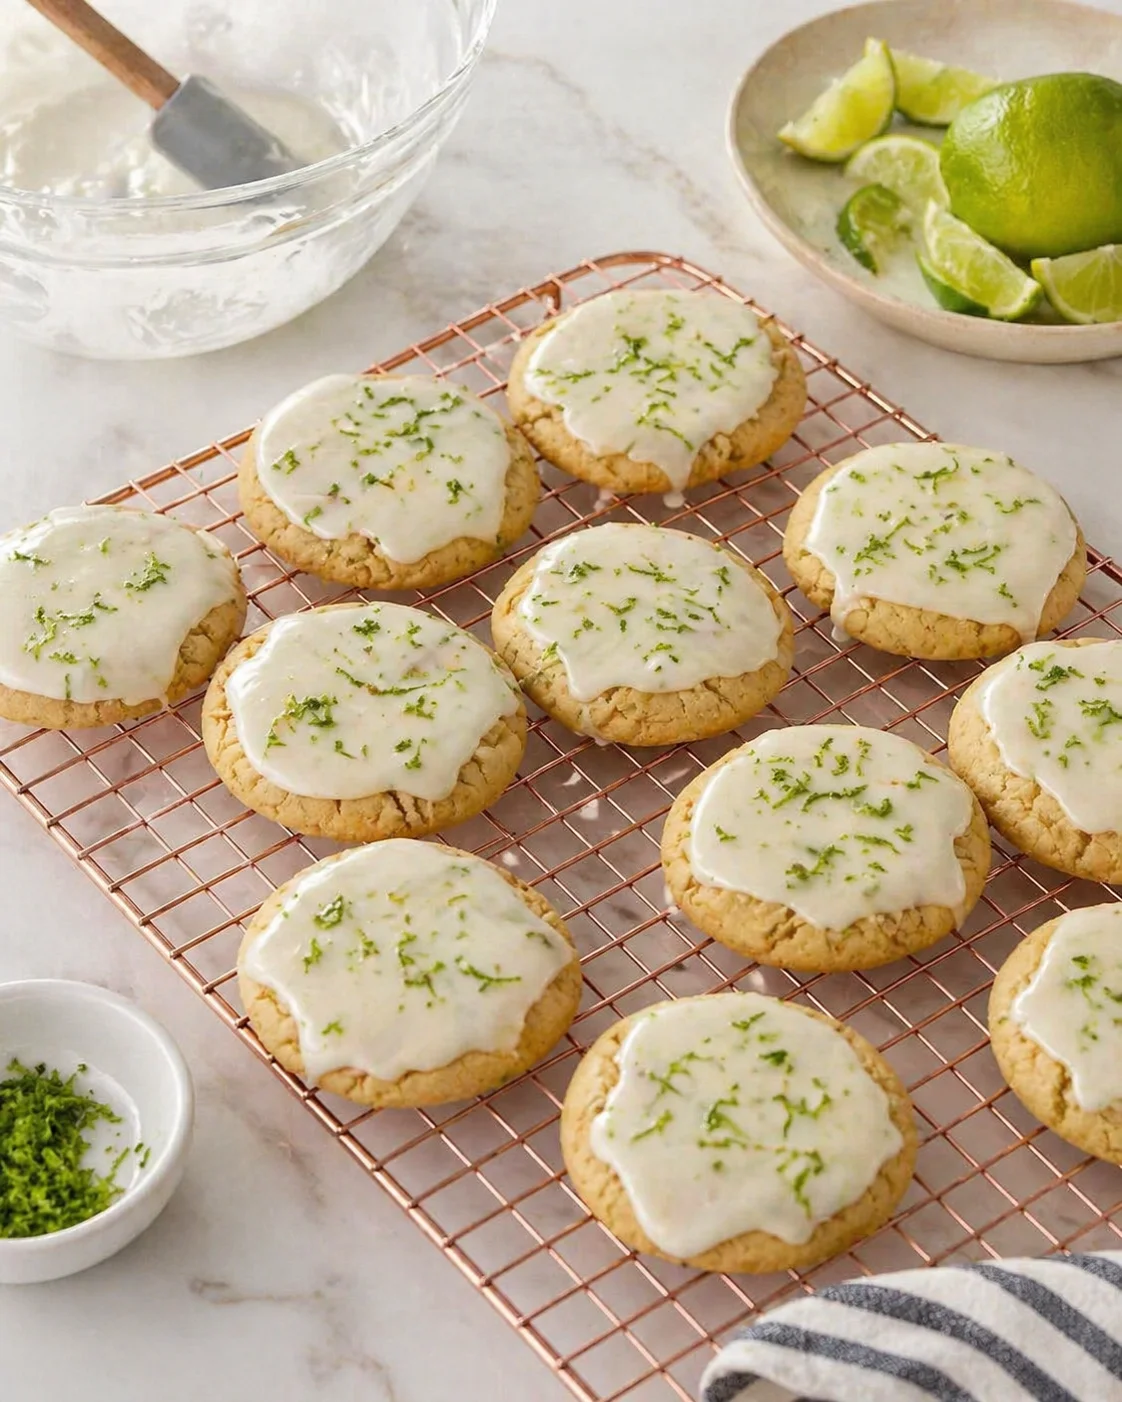
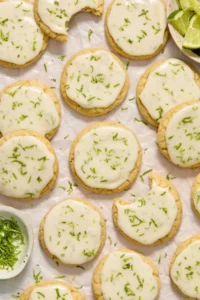
Key Lime Cookies
Step aside key lime pie, these soft and chewy Key Lime Cookies are the fresh, bright treat your family will love. Imagine a tender cookie with the perfect chew, topped with a zesty key lime glaze—these easy cookies come together in just 10 minutes and are pure lime magic for cookie lovers everywhere!
There’s just something about the fresh zing of citrus in cookies that feels like sunshine in every bite. It’s my go-to when the weather warms up.
Now don’t get me wrong, classic chocolate chip cookies are forever favorites in our house. But these lime cookies bring a bright, happy twist that keeps things fun and fresh—perfect when you’re craving something different yet comforting.
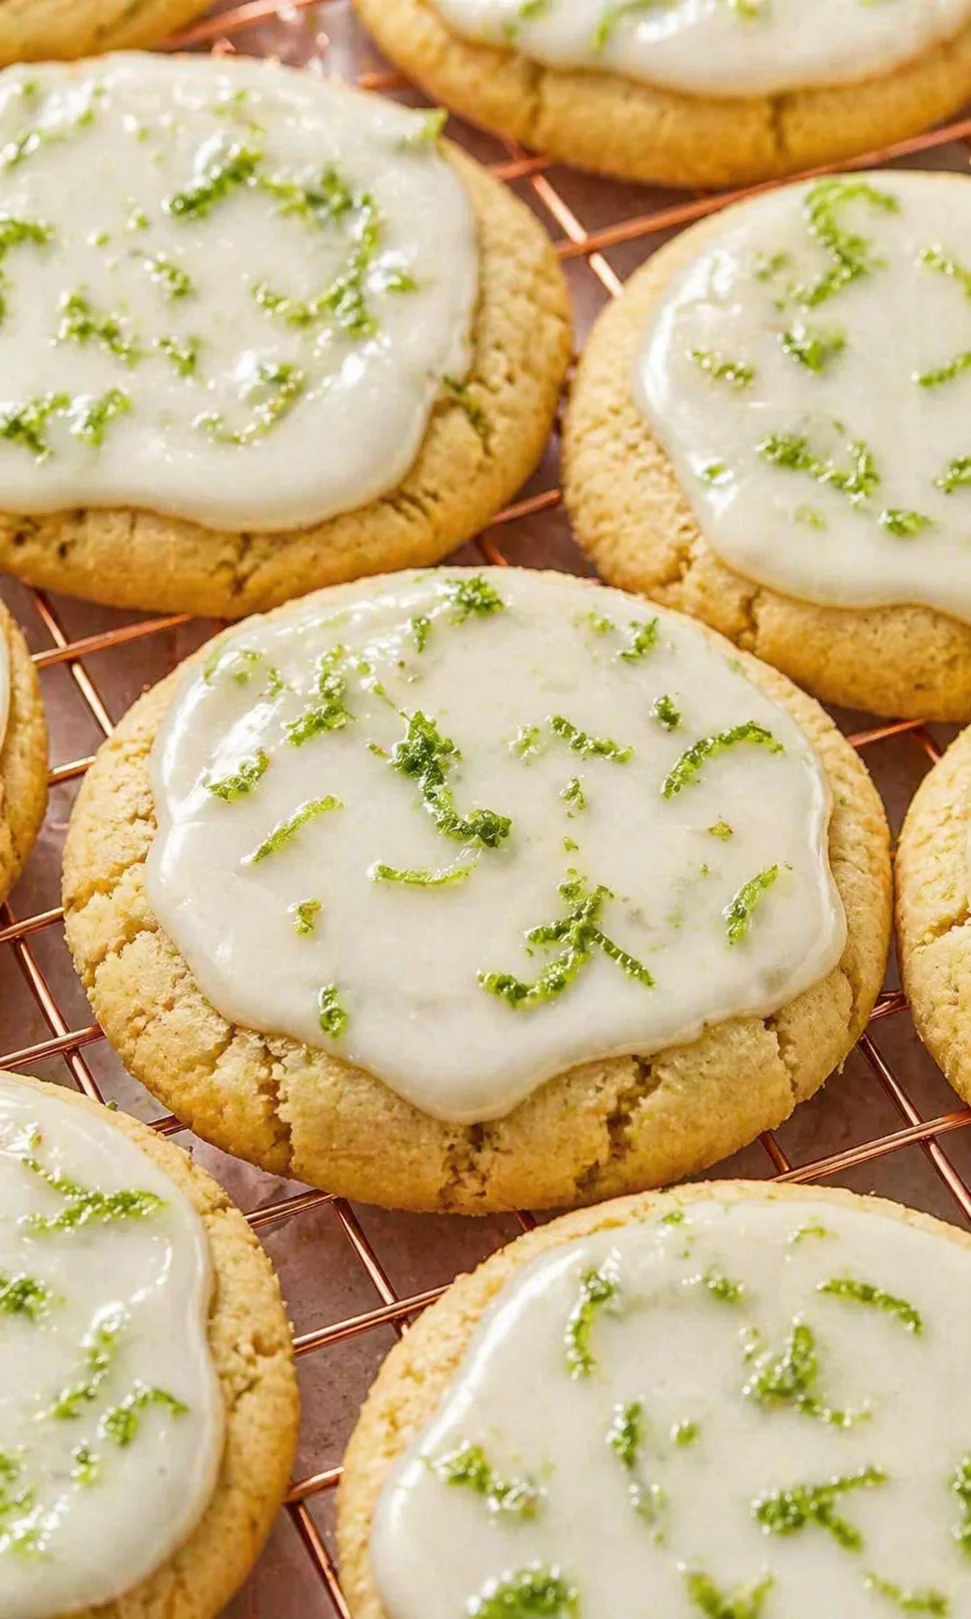
Move over pie, these soft and chewy Key Lime Cookies are bursting with refreshing flavor. With a tender texture and a glossy key lime glaze, these easy cookies are every lime lover’s dream! And they take just 10 minutes to mix up the dough!
These Key Lime Cookies are bright, tangy, and just a little indulgent—exactly the kind of summer cookie you didn’t know you needed on your baking list. They’re soft with a chewy center, bursting with the floral aroma of fresh key lime zest, and topped with a shiny glaze that really wakes up your taste buds.
What I love most? They come together in a flash—about 10 minutes to whip up the dough—and bring a fun citrus twist to an everyday cookie. Scroll down for a detailed recipe card with exact weights, helpful step-by-step photos, and tips and tricks to nail that perfect texture every time. Plus, I’ll share ideas for simple swaps and how to store or freeze your dough and cookies so you can enjoy them whenever.
- Quick prep: You’ll have dough ready in just 10 minutes—no long chilling required (though a quick chill can help if the cookies want to spread too much).
- Bake time: These bake for 8 to 11 minutes for that soft, chewy edge—pull them out just a little early for the best bite.
- Glaze: The finishing touch is a simple powdered sugar glaze made with key lime juice and zest, either dipped or spread on top.
- Extras you’ll love: Helpful photos, troubleshooting tips for butter temperature and baking times, flavor swap ideas like white chocolate or coconut, plus storage and freezing advice.
Keep scrolling to the recipe card and let’s get those cookies baking—a little citrus zest goes a long way to brighten up snack time!
Step aside pie, these soft and chewy Key Lime Cookies are bursting with fresh, delicious flavor. Tender cookies iced with a zesty key lime glaze—this simple recipe is every lime lover’s dream! Only 10 minutes to prepare the dough!
What Makes Them Special
- Soft and chewy texture. If you adore soft, chewy cookies (think Soft & Chewy S’mores Cookies), these will be a delight. The edges set just right so each bite has that perfect chewiness, making them so satisfying.
- Super refreshing. Nothing beats the fresh, tangy punch of key limes. If you’re a fan of key lime desserts, these cookies capture that same vibrant flavor that brightens your day.
- Very simple to make. No chill time needed (though you can chill briefly if you want). The ingredients are straightforward, and with 10 minutes prep, these are a breeze to whip up.
- Perfect for summer. Who says summer treats can’t be baked? These cookies add a sunny, light flavor that’s great for hot days, picnics, or whenever you want a little tropical escape; if you love fruit-forward cookies, try blueberry cheesecake cookies.
What You’ll Need
- ½ cup unsalted butter (113g), softened to room temperature
- 1 large egg, room temperature
- ¾ cup sugar (150 g)
- ¼ cup light brown sugar (50g)
- 1 tsp vanilla extract
- 2-3 tsp key lime zest
- 1 ¾ cup flour (219g)
- 1/2 tsp baking soda
- 1/2 tsp salt
- 1 cup powdered sugar
- 1 Tbsp key lime juice
- 1-2 Tbsp milk
- ¼ tsp vanilla
- ½ tsp key lime zest
- Pinch of salt, optional
How to Make Them
- Preheat oven to 350°F (175°C).
- Whisk together flour, baking soda, and salt in a small bowl and set aside.
- Beat softened butter, light brown sugar, and granulated sugar with an electric mixer on high until light and fluffy, about 1–2 minutes.
-
Add the large egg and vanilla to the butter mixture and mix until just combined.
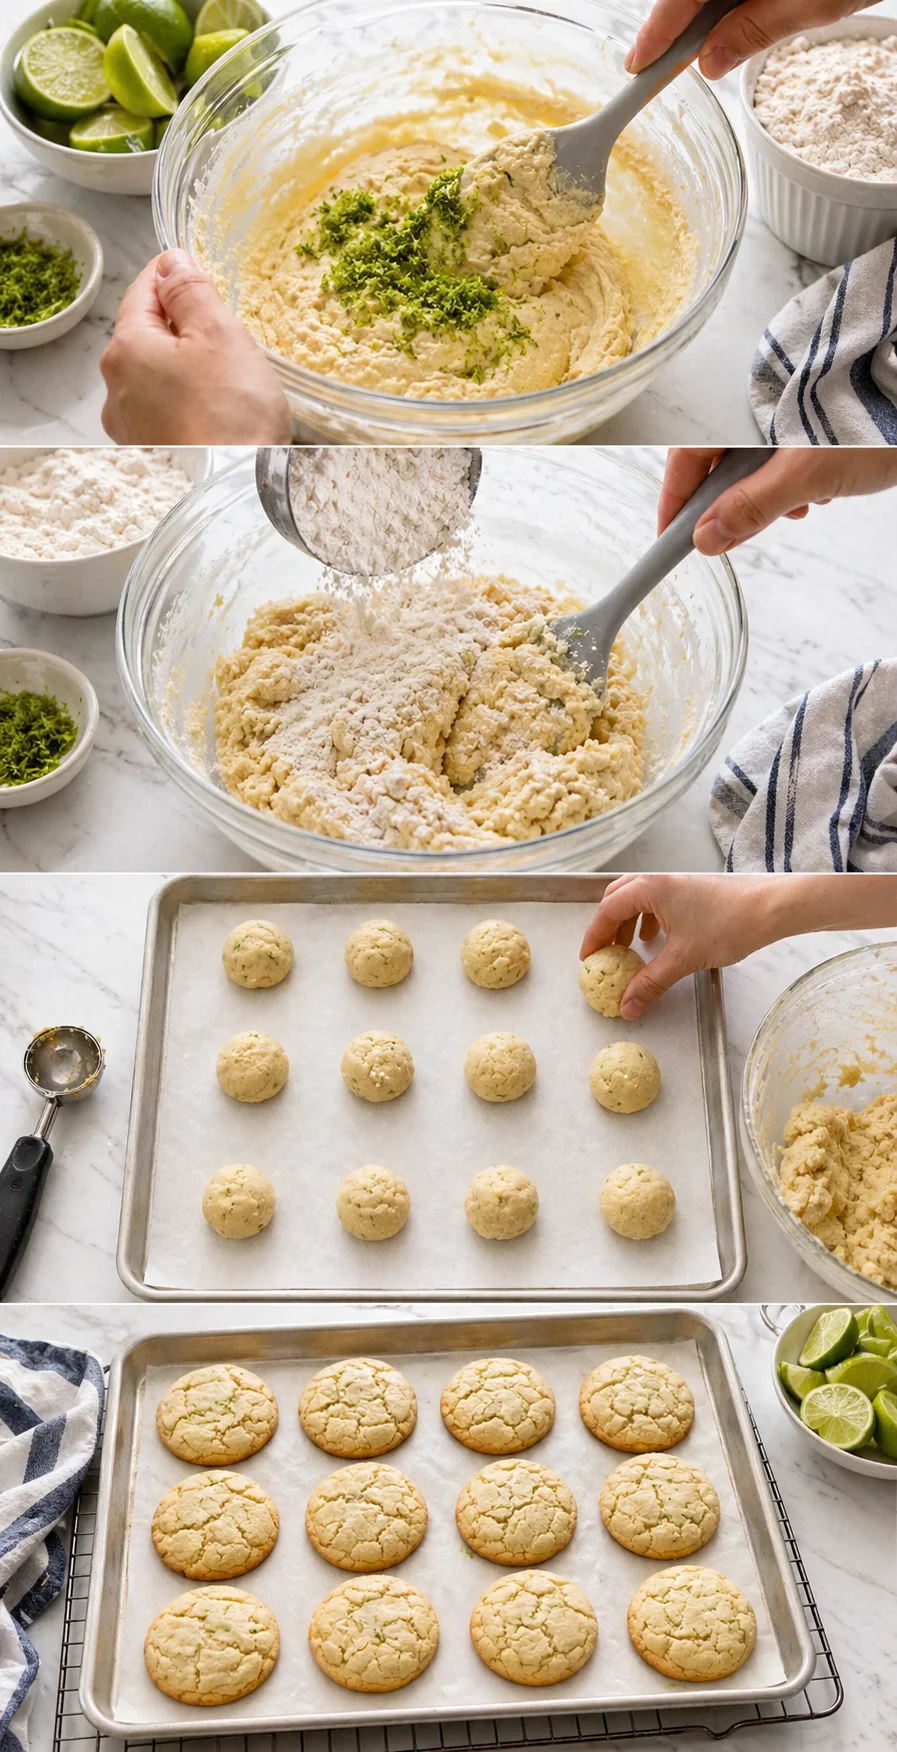
- Stir in 2–3 tsp key lime zest.
- Add the flour mixture to the wet ingredients in thirds, mixing lightly after each addition until just combined — avoid overmixing.
- Scoop and gently roll dough into smooth 1½‑inch balls and place them spaced on a parchment‑lined baking sheet (no chilling needed; if dough spreads too much, chill 15 minutes).
-
Bake at 350°F for 8–11 minutes, removing when edges are set but centers still slightly puffy.
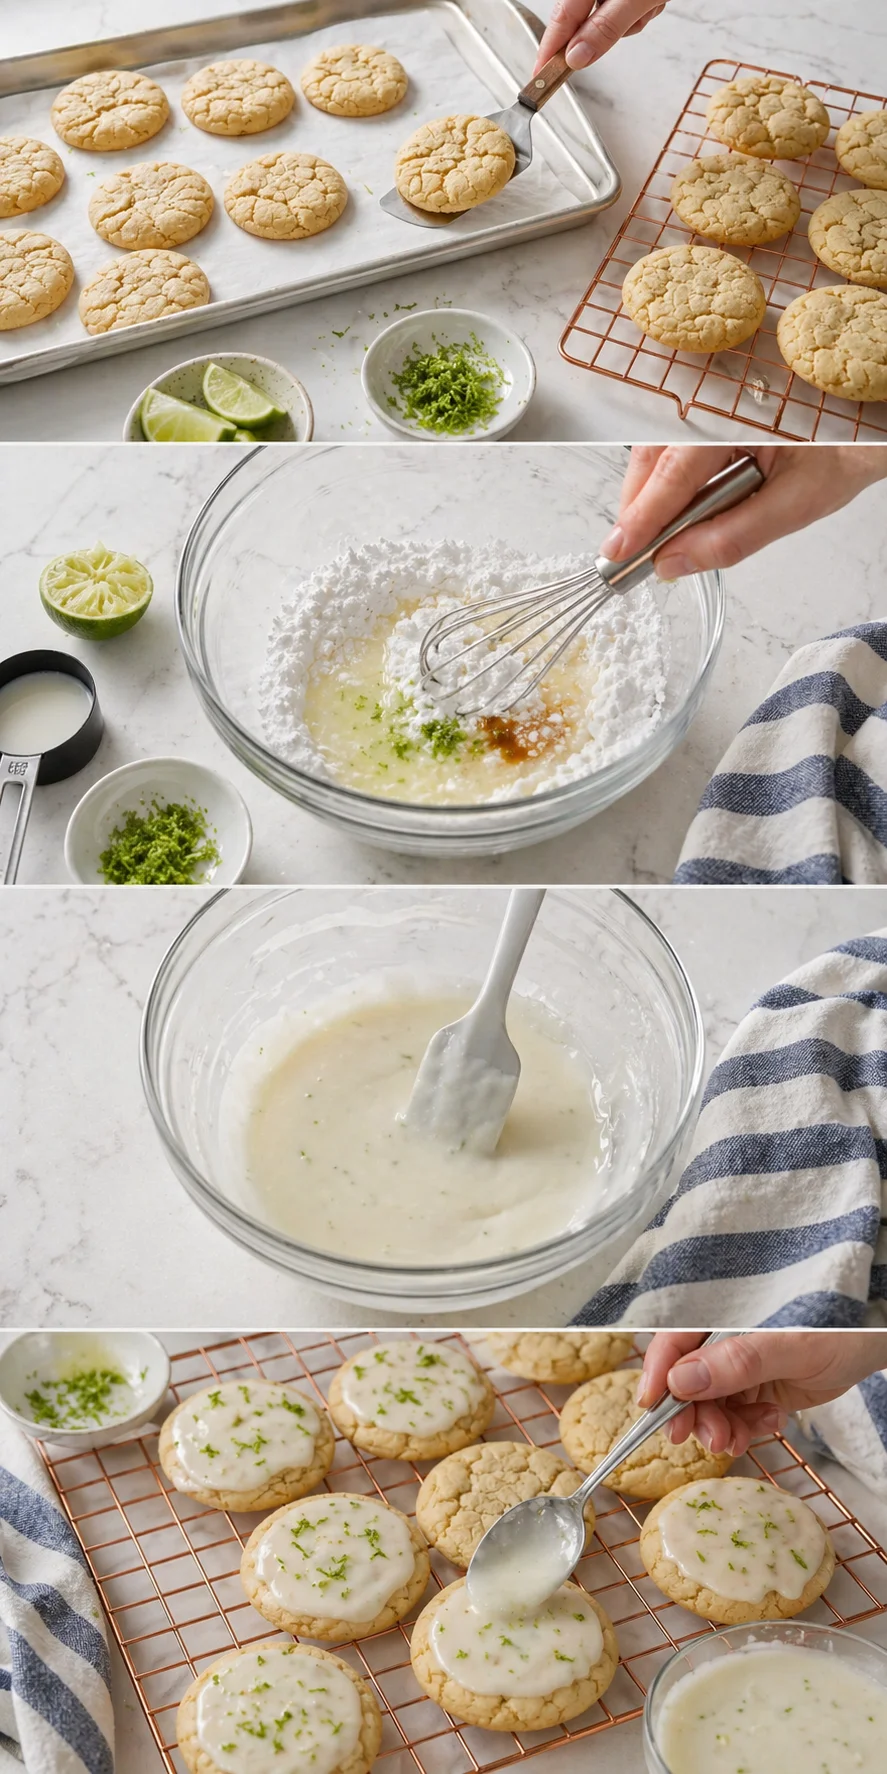
- Let cookies cool on the baking sheet for a few minutes, then transfer to a wire rack to cool completely.
- Whisk together powdered sugar, 1 Tbsp key lime juice, 1–2 Tbsp milk, ¼ tsp vanilla, ½ tsp key lime zest and a pinch of salt, adjusting powdered sugar or milk to reach desired glaze consistency.
- Let the glaze rest 5–10 minutes to thicken slightly.
-
Dip or spread the glaze over completely cooled cookies and sprinkle extra key lime zest on top.
-
Allow the glaze to set before serving.
Pro Tips for Chewy Cookies
Softened butter is your best friend here. Getting this right is a game changer for your cookie texture. You want the butter soft enough to mix smoothly but not melting. Press your finger into it—it should leave a slight indent but still hold its shape well. For a step-by-step look at gauging butter softness in a simple dough, see Easy Sugar Cookies.
Don’t overbake! To keep these cookies soft and chewy, take them out a bit early—the same gentle underbake that gives fudgy, chewy brookies their signature bite. They might still look a touch puffy and won’t brown much at the edges, but that’s exactly what you want.
Roll dough into smooth balls instead of using a cookie scoop. While it doesn’t change the flavor, rolling by hand gives you prettier, more uniform cookies, and let’s face it—we all love cookies that look as good as they taste!
Softened butter is key. Having your butter at just the right softness makes a world of difference in how these cookies turn out. It should gently yield under a finger press but still keep its shape.
Take them out before they’re fully baked. For that dreamy soft and chewy texture, pull your cookies from the oven just before you think they’re done. They’ll look a bit puffy and pale—that’s perfect!
Roll your dough into smooth balls by hand. Using your hands to shape the dough creates a prettier finished cookie than scooping, plus you get to enjoy a little kitchen therapy.
Flavor Swaps and Mix-Ins
Want to mix things up? Here are some easy tweaks and additions that pair beautifully with these cookies:
- Key limes → regular limes: If fresh key limes are hard to find, regular limes work just fine. You’ll get a bright, tart flavor that’s a little less floral but still delicious.
- Try different extracts: Boost the lime flavor by swapping half of the vanilla for lime extract (like ½ tsp vanilla + ½ tsp lime extract). For vivid color and extra citrus, see how lime gelatin adds both in these Jello sugar cookies.
- Add some mix-ins: Stir in white chocolate chips or chopped macadamia nuts (up to ½ cup) for a tropical, sweet crunch.
- Coconut lime: Toss ⅓ cup shredded coconut into the dough for extra texture and a sweet, island vibe.
- Give your cookies sparkle and crunch: Roll dough balls in granulated or coarse sugar before baking for a sparkly, lightly crisp exterior—similar to the sugared finish on these apple cider cookies.
- Switch up the glaze: Try a cream cheese glaze made with softened cream cheese, powdered sugar, and lime juice, or spread a thin layer of lime curd for an extra zingy twist.
- Cookie sandwiches: Spread lime curd or cream cheese lime filling between two cookies for a show-stopping treat.
- Adjust texture: If your cookies spread too much, chill the dough for 15-30 minutes. For crisper edges, bake a little longer; for softer centers, reduce baking time slightly.
- Gluten-free option: Use a 1:1 gluten-free all-purpose flour blend and chill dough briefly to help with handling.
- Vegan option: Swap butter for vegan stick shortening or margarine and use a flax egg (1 tbsp ground flax + 3 tbsp water, chilled). The texture changes a bit, but the lime flavor still shines brightly.
Storage and Freezing Tips
These cookies tend to disappear fast, but if you have extras, store them in an airtight container at room temperature for up to 4-5 days. I find they taste best in the first three days when they’re at their softest, though they’re still delicious a couple days after that.
You can also refrigerate them for up to 5 days if you like—similar to cream cheese–based cookies like Blueberry Cheesecake Cookies. For freezing baked cookies, make sure they’re completely cool first. I prefer freezing cookies without the glaze and then adding it when they thaw for the freshest look and taste, but you can freeze them iced if you prefer.
To keep icing from sticking between cookies, pop a piece of parchment or wax paper between layers if you stack them.
For freezing dough, I roll it into balls first—it makes it so easy to bake fresh cookies whenever the mood strikes; this method also works well for classic drop cookies like cookies and cream cookies. Arrange the dough balls in a freezer-safe bag or container with a little space between them.
The dough keeps well for up to 3 months. You can bake straight from frozen, adding 2 to 4 minutes extra to the bake time, or thaw to room temperature and bake as usual.
These cookies are usually devoured fast, but if you have leftovers, store them in an airtight container at room temperature for up to 4-5 days. They’re softest and freshest in the first three days but stay tasty a bit longer.
Feel free to refrigerate them for about 5 days if you want a firmer texture. To freeze baked cookies, make sure they’re fully cooled first. I like freezing them without the glaze and adding it once thawed, but freezing iced cookies works too.
Keep cookies separated with parchment or wax paper if stacking so the icing layers don’t stick.
For freezing dough, roll into balls first and freeze spaced in a freezer-safe container or bag. Dough stores well for up to 3 months. Bake from frozen by adding 2-4 minutes to your baking time, or thaw and bake as normal.
Key Lime FAQs
Q: Can I use regular limes instead of key limes?
A: Key limes are smaller and rounder than typical limes with thin skins. Their flavor is more tart and floral, giving a lovely aromatic punch to desserts.
If you can’t find key limes, no worries—regular limes are a great substitute. The flavor difference is subtle once baked, and both deliver that citrusy refreshment these cookies are all about. If you’re craving more bright citrus in dessert form, try our Lemon Rhubarb Bars.

Soft and chewy cookies bursting with fresh, delicious key lime flavor, topped with a zesty key lime glaze. Quick to prepare and perfect for a refreshing summer treat.
- Prep Time: 10 minutes
- Cook Time: 8-11 minutes
- Total Time: 18-21 minutes
- Yield: About 24 cookies 1x
- Category: Dessert
Ingredients
- ½ cup unsalted butter (113g), softened to room temperature
- 1 large egg, room temperature
- ¾ cup granulated sugar (150g)
- ¼ cup light brown sugar (50g)
- 1 tsp vanilla extract
- 2–3 tsp key lime zest
- 1 ¾ cup all-purpose flour (219g)
- ½ tsp baking soda
- ½ tsp salt
- 1 cup powdered sugar
- 1 Tbsp key lime juice
- 1–2 Tbsp milk
- ¼ tsp vanilla extract (for glaze)
- ½ tsp key lime zest (for glaze)
- Pinch of salt (optional, for glaze)
Instructions
- Preheat oven to 350°F (175°C).
- In a small bowl, whisk together flour, baking soda, and salt; set aside.
- Using an electric mixer on high, beat softened butter, light brown sugar, and granulated sugar until light and fluffy, about 1–2 minutes.
- Add the large egg and vanilla extract to the butter mixture; mix until just combined.
- Stir in 2–3 tsp key lime zest.
- Add the flour mixture in thirds to the wet ingredients, mixing lightly after each addition until just combined. Avoid overmixing.
- Scoop and gently roll dough into smooth 1½-inch balls and place spaced on a parchment-lined baking sheet. No chilling needed; if cookies spread too much, chill dough for 15 minutes.
- Bake at 350°F for 8–11 minutes, removing when edges are set but centers still slightly puffy.
- Let cookies cool on the baking sheet for a few minutes, then transfer to a wire rack to cool completely.
- For glaze: Whisk together powdered sugar, 1 Tbsp key lime juice, 1–2 Tbsp milk, ¼ tsp vanilla, ½ tsp key lime zest, and a pinch of salt (optional). Adjust powdered sugar or milk to achieve desired consistency.
- Let glaze rest 5–10 minutes to thicken slightly.
- Dip or spread glaze over completely cooled cookies; sprinkle extra key lime zest on top.
- Allow the glaze to set before serving.
Notes
Softened butter is important: it should yield under slight finger pressure but still hold shape., Do not overbake; cookies should be taken out while slightly puffy and pale for best chewy texture., Rolling dough into smooth balls by hand produces prettier, uniform cookies than using a cookie scoop., If dough spreads too much, chilling it 15–30 minutes before baking helps., Gluten-free option: Use 1:1 gluten-free all-purpose flour blend and chill dough briefly to help with handling., Vegan option: Substitute butter with vegan margarine or shortening and replace egg with flax egg (1 tbsp ground flax + 3 tbsp water)., For freezing dough, roll into balls first; dough keeps well up to 3 months and can be baked from frozen with 2-4 minutes added to bake time., Store baked cookies in airtight container at room temperature up to 4-5 days; refrigerate for up to 5 days for firmer texture., Freeze baked cookies unglazed for best results; add glaze after thawing, or freeze iced cookies if preferred.
Nutrition
- Serving Size: 1 cookie
- Calories: Approximately 120 calories per cookie
- Fat: Approximately 4.5 grams per cookie
- Carbohydrates: Approximately 20 grams per cookie
- Protein: Approximately 1.5 grams per cookie
More in Breakfast
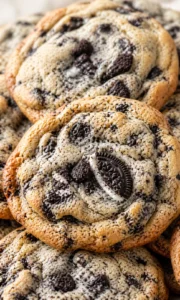
The Best Cookies and Cream Cookie Recipe
Key Lime Cookies
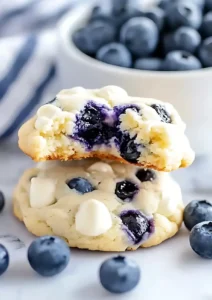
Perfect Blueberry Cheesecake Cookies